Warden offers a growing library of premium smart contract extensions – Asynchronous Verifiable Resources (AVRs), or Plugins. They allow you to seamlessly connect to any digital resource – whether onchain or offchain – with full interoperability across 100+ supported blockchains.
No specialized knowledge required! Add Plugins in minutes with just 10 lines of code. Combine or chain Plugins to build more sophisticated applications.
This step-by-step guide walks you through deploying your first Warden-enabled Solidity contract on Ethereum Sepolia. You’ll use Remix to deploy the contract; then you’ll send a request to Venice AI and receive the response, which will be stored onchain.
Venice LLM Inferences
Warden’s LLM inferences Plugin allows your smart contract to request LLM inferences from Venice AI. It accepts ABI-encoded Solidity structs as input and returns strings. In the input, you define the prompt, model, and other parameters. To learn more, see LLM inferences in Warden Studio.
The steps below walk you through deploying a contract that integrates with the LLM Inferences Plugin. You’ll use our example code, so you don’t need to understand every detail to get started. After deployment and testing, you can experiment by customizing the input parameters in the code.
Step-by-Step Guide: Request an AI Inference on Sepolia
Step 1. Prepare Your Wallet
To interact with Warden from Sepolia, you need a funded wallet:
Create a wallet in MetaMask.
Fund your wallet with Sepolia ETH. For example, you can use these faucets:
In MetaMask, select the Sepolia network.
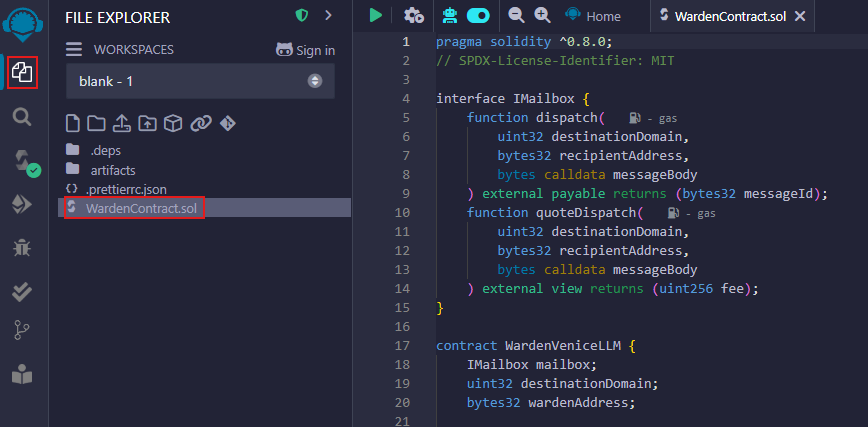
Step 2. Create a Contract
Now create a Warden contract in Remix:
In the File Explorer, create a file
WardenContract.sol.Paste the contract code from Warden Studio:
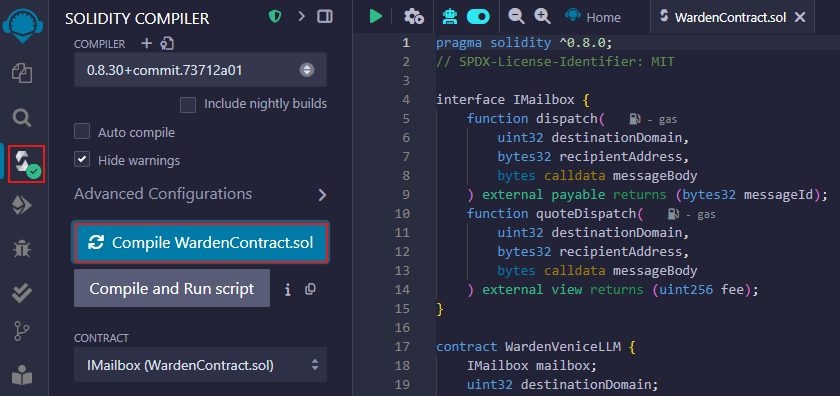
 Step 3. Compile
To compile your contract, do this:
In the left-hand menu, navigate to Solidity Compiler.
Click Compile WardenContract.sol.
If the compilation is succesful, you’ll see a green check mark on the compiler icon.
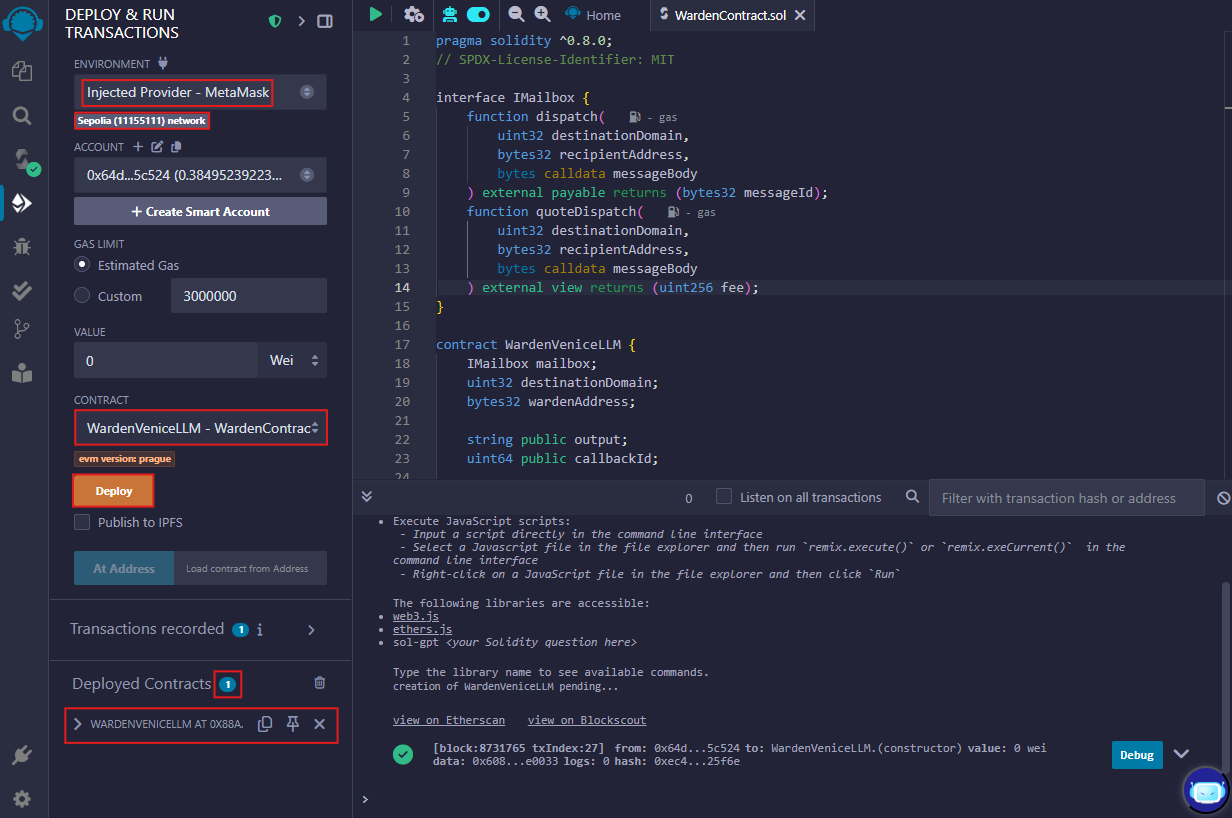
 Step 4. Deploy
Deploy your contract on Sepolia:
Navigate to Deploy & Run.
In the ENVIRONMENT box, select Injected provider - MetaMask. Make sure that the Sepolia network is enabled.
In the CONTRACT box, select WardenVeniceLLM - WardenContract.sol.
Click Deploy and approve the transaction in Metamask. You’ll pay a gas fee in Sepolia.
Wait for a few seconds. Once the trasaction is complete, you’ll see your contract under Deployed Contracts. You can also check your transaction on Etherscan: the link will be displayed in the console.
 Step 5. Request an Inference
Now you can interact with your contract and request an inference from the Venice LLM:
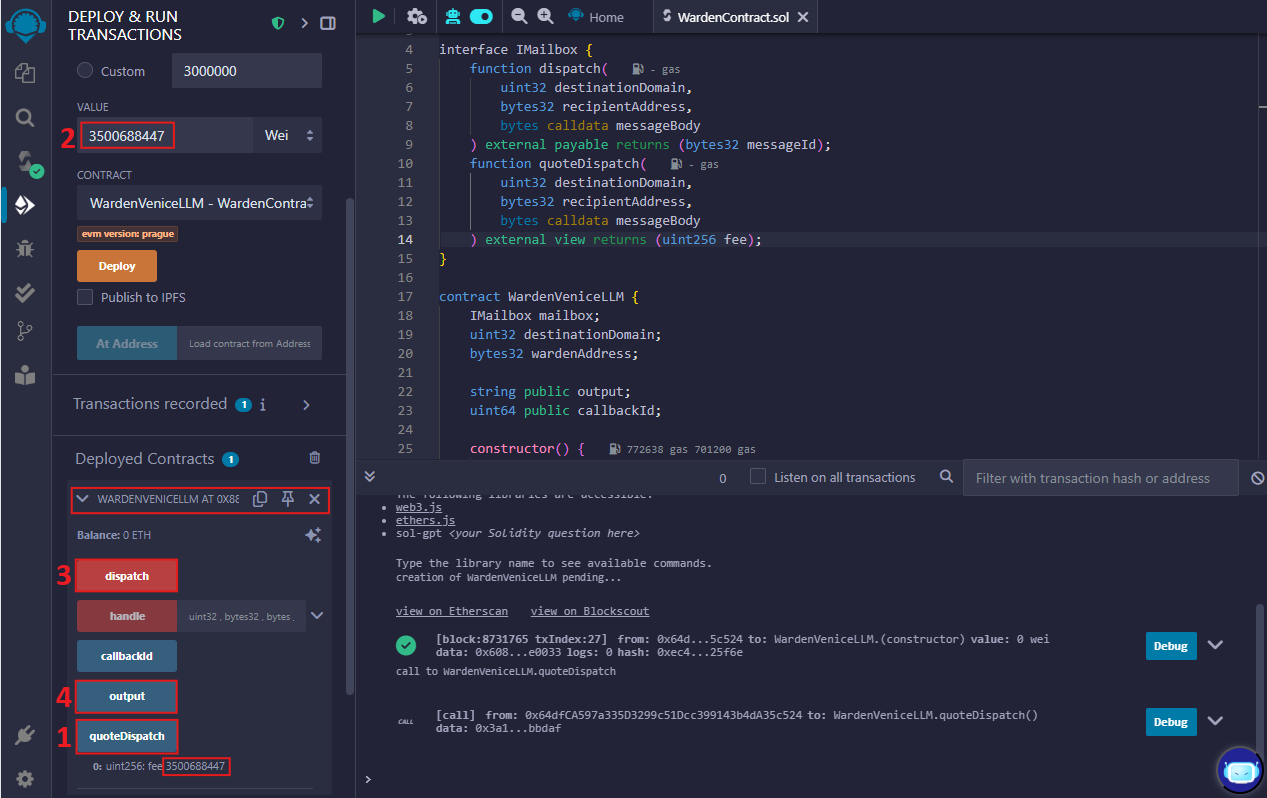
Expand the deployed contract and click quoteDispatch to get a gas fee estimation.
Copy the value displayed under quoteDispatch and paste it in the VALUE box.
Now click Dispatch and confirm the transaction in MetaMask (you’ll pay the specified gas fee). Congratulations! You’ve just requested an inference from the Venice AI.
Wait for transaction confirmation and click Output: once the response is ready, it’ll be displayed under this button. If it’s not displayed, wait more and click Output again; you can also check your transaction on Etherscan.
 How Does It Work?
The “secret sauce” that makes it so easy for developers to use Warden AVRs is in fact our message passing architecture. We use Hyperlane to achieve cross-chain interoperability, so users only need to pay in their native gas tokens.
In short, we abstract all the costs in one function call – quoteDispatch(), which returns the total value for fees users need to pay. Once that value is obtained, all that is left is to call dispatch() in order to send the actual request to the Plugin.
To interact with Warden, you need to reference two contracts we deployed: a Hyperlane mailbox contract on Sepolia and another contract on Warden. See mailbox and wardenAddress in the code example:
mailbox:0x2e7FAb47da4AeE0A8b8F8AAfFAB1Ca698F864bdfwardenAddress:0x1bF0866b1f0D4213845058927F726D85085c76B2
Your contract dispatches messages to the mailbox, which, in turn, sends them to Warden through Hyperlane. Then our Warden contract makes requests for Plugins by calling Warden’s x/async module. To learn more about how Plugins work under the hood, read the x/async developer documentation.
What’s Next?
Now that you've deployed your first Warden Plugin, you can dive deeper and start customizing your contract:
In the example you just used, the input parameters are hardcoded. You can modify the message (prompt) and other fields and re-deploy the contract to see how the output changes. To learn more, see the LLM Inferences Plugin in Warden Studio. A detailed input breakdown is available in the Demo section.
To avoid redeploying the contract each time you update parameters, you can make them dynamic by accepting arguments in the
quoteDispatch()anddispatch()functions. This allows you to set the parameters directly from Remix after deployment, using the quoteDispatch and dispatch buttons. Here's an example of how to implement a dynamic prompt:function dispatch(string calldata prompt) external payable returns (bytes32 messageId) { <...> } function quoteDispatch(string calldata prompt) external view returns (uint256 fee) { <...> }Finally, explore other Plugins! They work the same way – you can call them using the same functions. The only difference is the structure of the input. For input details and code examples, check out the available Plugins in Warden Studio.